Vue3, Firebase 프로젝트 - 채팅앱 VSignal
18. [따라하기] Vue 3 + Firebase Auth 예제
그랜파 개발자
2025. 4. 25. 19:33
Vue 3 + Firebase Auth 예제 따라하기
Vue 3 + Firebase Auth 예제를 ChatGPT가 시키는 대로 해 봅시다.
프로젝트를 만들고, firebase를 설치한 후 설정을 하고,
Firebase Auth의 기능을 이용하여 회원 가입과 로그인 기능까지 구현합니다.
✅ 목표 기능
- 이메일/비밀번호 회원가입
- 로그인
- 로그아웃
- 현재 로그인된 유저 표시
🛠️ 기본 프로젝트 설정
C:\2025\grand-fa_2025>npm create vite@latest my-app -- --template vue

> npx
> cva my-app --template vue

│
◇  Scaffolding project in C:\2025\grand-fa_2025\my-app...
│
└  Done. Now run:

  cd my-app
  npm install
  npm run dev


C:\2025\grand-fa_2025>cd my-app

C:\2025\grand-fa_2025\my-app>npm install

added 30 packages, and audited 31 packages in 9m

4 packages are looking for funding
  run `npm fund` for details

found 0 vulnerabilities

C:\2025\grand-fa_2025\my-app>npm run dev

> my-app@0.0.0 dev
> vite


  VITE v6.2.5  ready in 367 ms

  ➜  Local:   http://localhost:5173/
  ➜  Network: use --host to expose
  ➜  press h + enter to show help
Firebase 설치
npm install firebase
폴더 구조
my-app
├─ .env
├─ index.html
├─ package-lock.json
├─ package.json
├─ public
│  └─ vite.svg
├─ README.md
├─ src
│  ├─ App.vue
│  ├─ assets
│  │  └─ vue.svg
│  ├─ components
│  │  └─ HelloWorld.vue
│  ├─ firebase.js
│  ├─ main.js
│  ├─ style.css
│  └─ views
│     └─ Auth.vue
└─ vite.config.js
1. 환경 변수 - .env
.env 파일은 환경 변수(Environment Variables) 를 정의하는 파일이에요.
앱을 실행할 때 필요한 비밀 키, API 키, 설정 값 등을 보관하는 데 사용되며,
Vue, Vite, Node.js, Firebase 등에서 자주 사용돼요!

2. firebase.js
// src/firebase.js
import { initializeApp } from "firebase/app";
import { getAuth } from "firebase/auth";
import { getFirestore } from "firebase/firestore";

const firebaseConfig = {
  apiKey: import.meta.env.VITE_FIREBASE_API_KEY,
  authDomain: import.meta.env.VITE_FIREBASE_AUTH_DOMAIN,
  projectId: import.meta.env.VITE_FIREBASE_PROJECT_ID,
  storageBucket: import.meta.env.VITE_FIREBASE_STORAGE_BUCKET,
  messagingSenderId: import.meta.env.VITE_FIREBASE_MESSAGING_SENDER_ID,
  appId: import.meta.env.VITE_FIREBASE_APP_ID,
};

// Firebase 초기화
const app = initializeApp(firebaseConfig);
const auth = getAuth(app);
const db = getFirestore(app);

export { auth, db };
3. main.js
// src/main.js
import { createApp } from 'vue'
import './style.css'
import App from './App.vue'

createApp(App).mount('#app')
4. App.vue
<!-- src/App.vue -->
<template>
  <div>
    <Auth />
  </div>
</template>

<script setup>
import Auth from './views/Auth.vue';
</script>
5. Auth.vue
<!-- src/views/Auth.vue -->
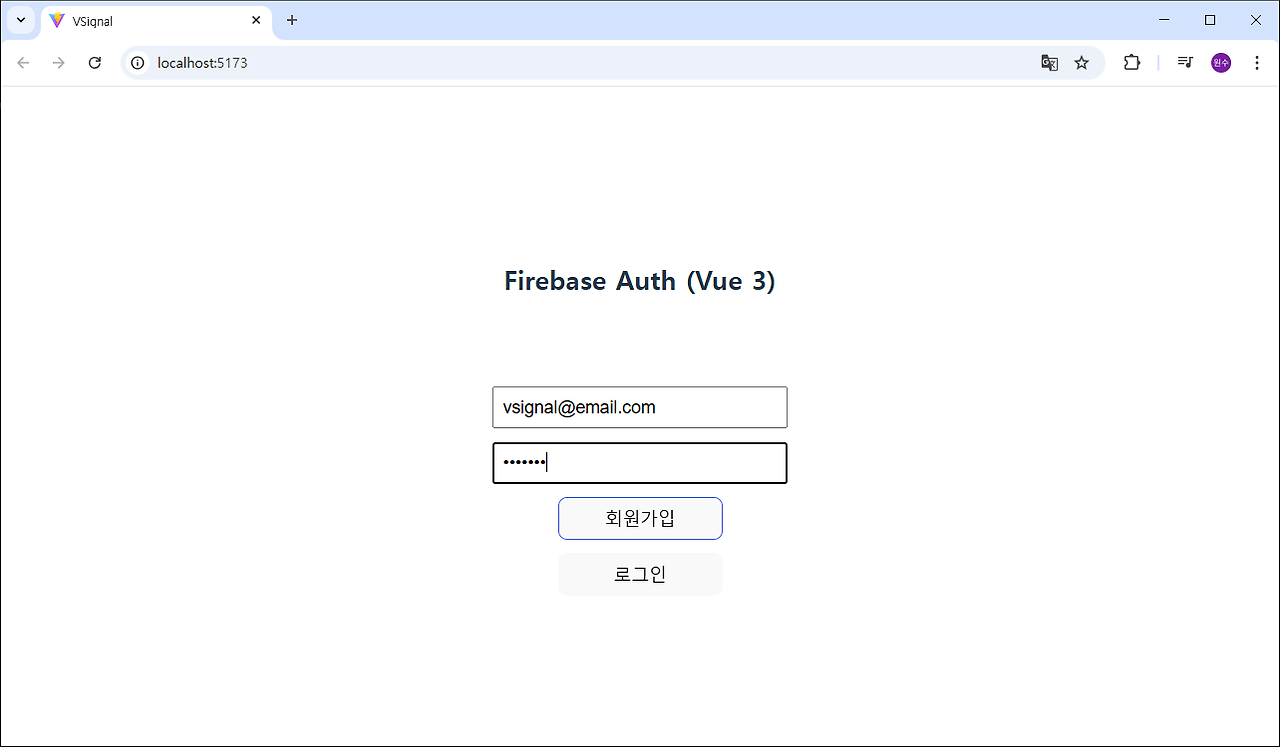
<template>
<div class="auth">
<h2>Firebase Auth (Vue 3)</h2>
<div v-if="!user" class="auth-box">
<input v-model="email" type="email" placeholder="이메일" />
<input v-model="password" type="password" placeholder="비밀번호" />
<button @click="signUp">회원가입</button>
<button @click="logIn">로그인</button>
</div>
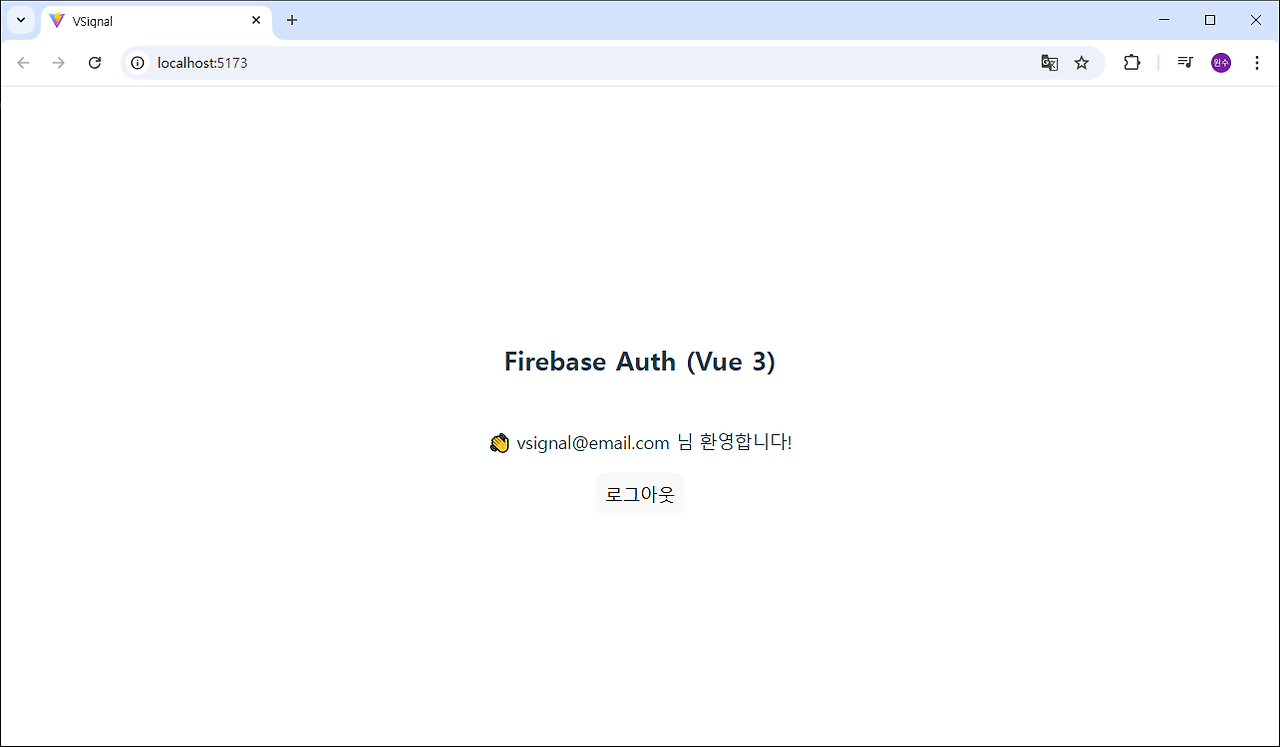
<div v-else>
<p>👋 {{ user.email }} 님 환영합니다!</p>
<button @click="logOut">로그아웃</button>
</div>
</div>
</template>
<script setup>
import { ref, onMounted } from 'vue';
import { auth } from '../firebase';
import {
createUserWithEmailAndPassword,
signInWithEmailAndPassword,
signOut,
onAuthStateChanged
} from 'firebase/auth';
const email = ref('');
const password = ref('');
const user = ref(null);
// 로그인 상태 추적
onMounted(() => {
onAuthStateChanged(auth, (currentUser) => {
user.value = currentUser;
});
});
const signUp = async () => {
try {
const userCredential = await createUserWithEmailAndPassword(auth, email.value, password.value);
user.value = userCredential.user;
alert("회원가입 성공!");
} catch (error) {
alert("회원가입 실패: " + error.message);
}
};
const logIn = async () => {
try {
const userCredential = await signInWithEmailAndPassword(auth, email.value, password.value);
user.value = userCredential.user;
alert("로그인 성공!");
} catch (error) {
alert("로그인 실패: " + error.message);
}
};
const logOut = async () => {
await signOut(auth);
user.value = null;
};
</script>
<style scoped>
/* style.css 또는 <style>에 추가 */
.auth-box {
display: flex;
flex-direction: column;
gap: 12px;
align-items: center;
margin-top: 50px;
}
.auth-box input {
padding: 8px;
width: 250px;
}
.auth-box button {
padding: 10px;
width: 150px;
}
</style>🎉 이제 실행해보세요!
npm run dev
이제 회원가입, 로그인, 로그아웃, 그리고 현재 로그인된 유저 확인까지 가능해요!